Free shipping over $100: please allow 2 to 4 weeks for your order to be sent
Let It Snow – Snowflake Christmas Ornament (free crochet pattern)
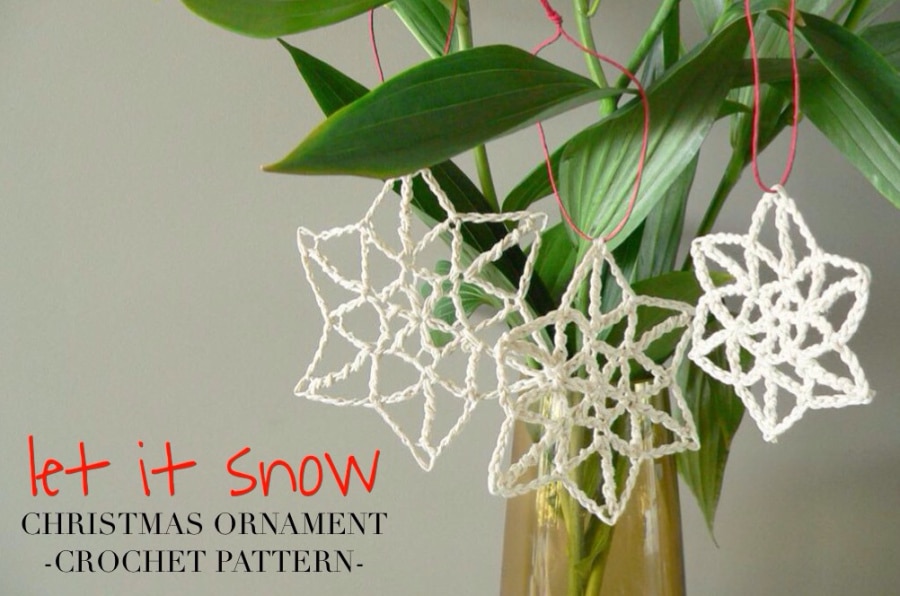
Do you want to make a white Christmas – Aussie style? Since it’s highly unlikely that it’ll snow in Australia for Christmas (or just plain impossible), I’m creating a white Christmas by crocheting snowflakes. The pattern is quick to make and the snowflakes are easy to make which makes them a perfect tv watching project. The other bonus is that you may already have all the materials and equipment you’ll need.
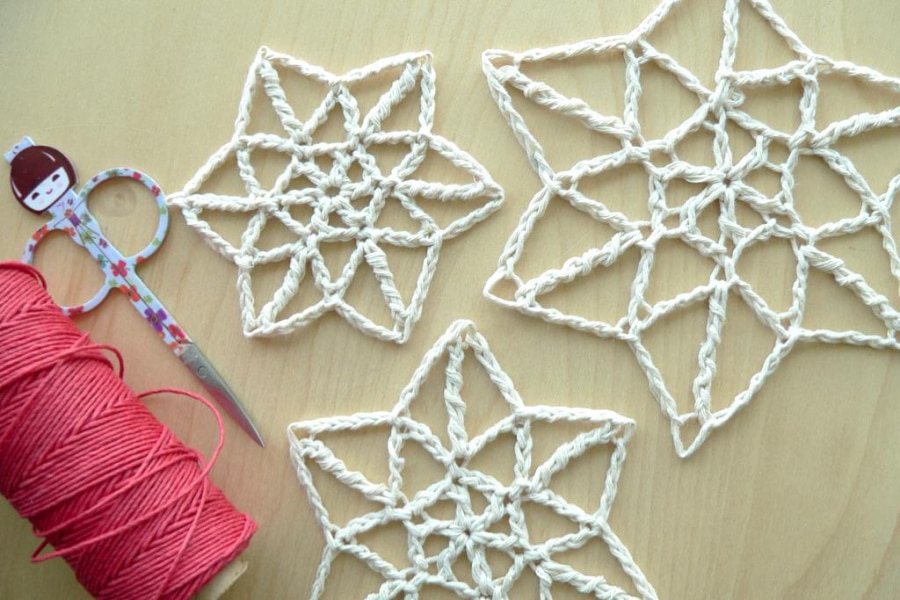
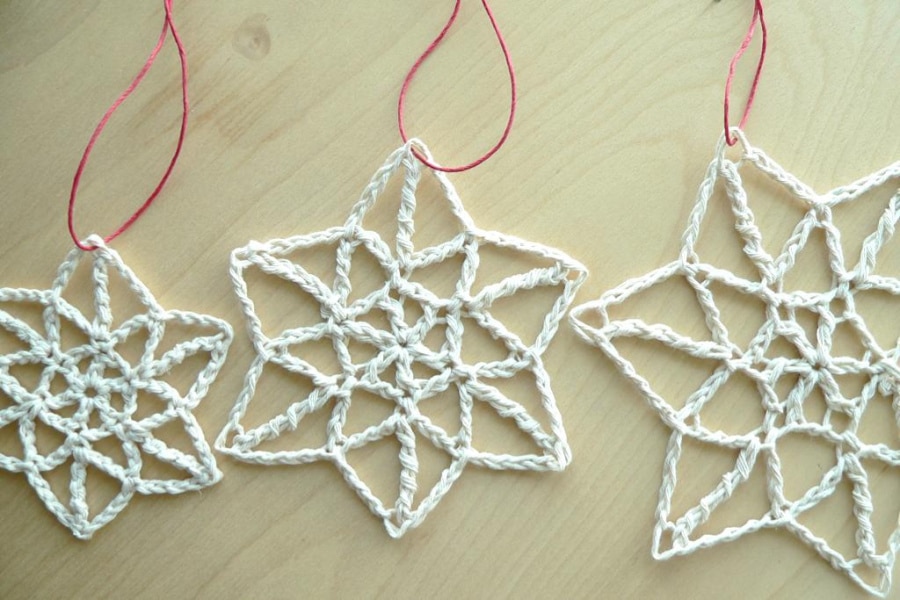
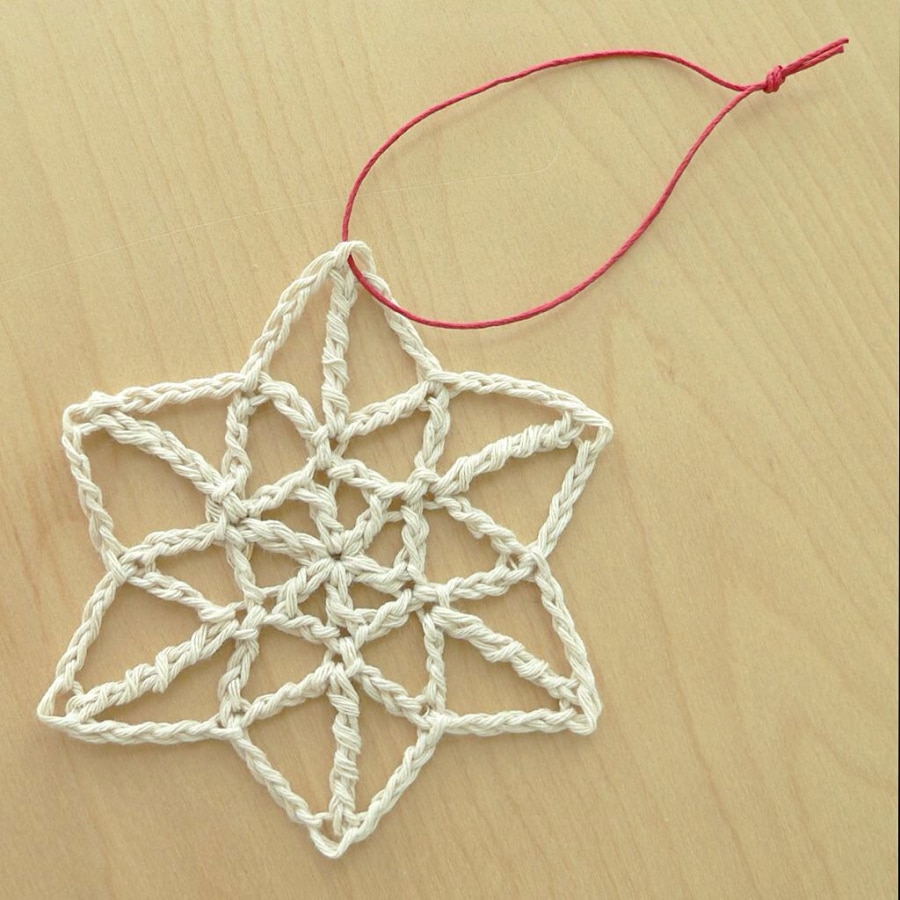
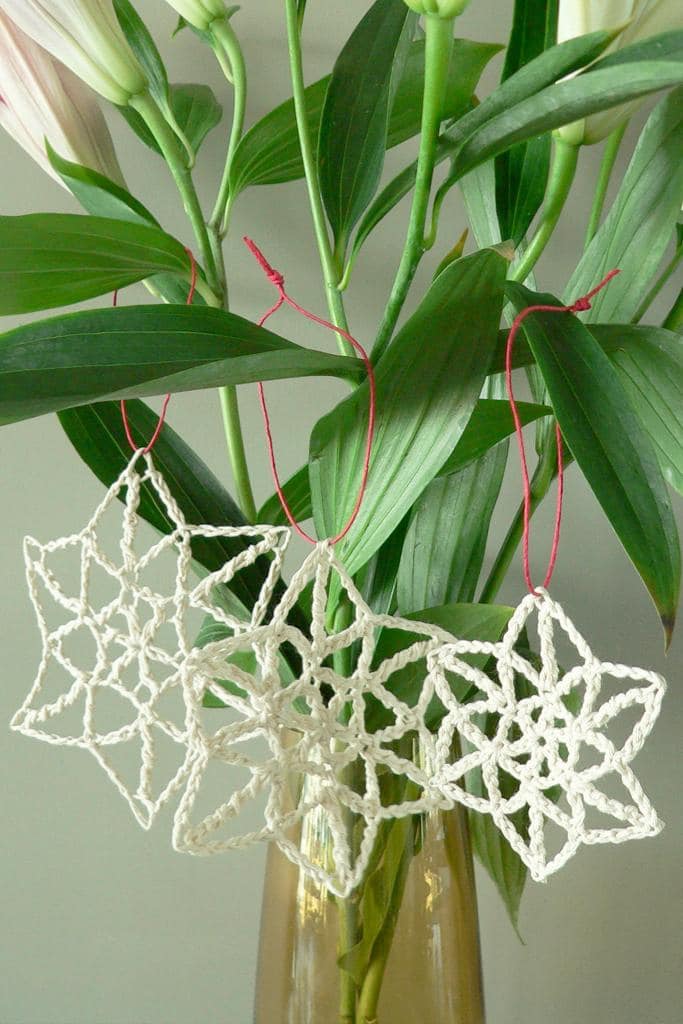
Here’s what the finished snowflakes look like:
what you’ll need
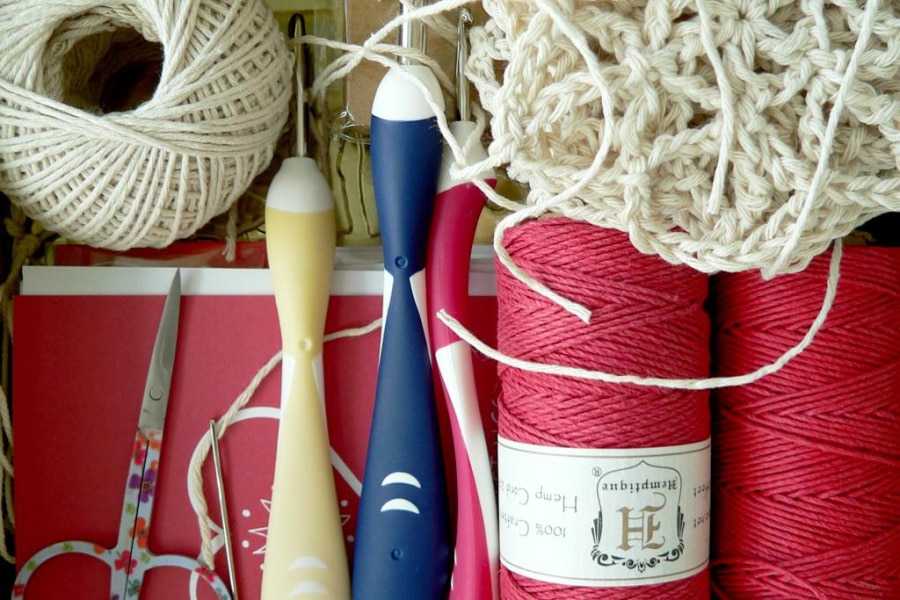
- Natural coloured twine for making the snowflakes (I bought mine from my local supermarket).
- Different coloured twine or yarn for hanging the snowflakes.
- Crochet hooks – 3.25mm for making a small snowflake, 4.50mm for making a medium snowflake and 6.00mm for making a large snowflake.
- Scissors.
- Darning needle.
- Pins for blocking.
- Something to pin onto for blocking. I use foam tiles, but you can use an ironing board or anything that a pin will stand up in.
snowflake sizes
I’ve made 3 different sized snowflakes by using different sized hooks. The sizes are:
- Small – 90mm in diameter.
- Medium – 110mm in diameter.
- Large – 150mm in diameter.
how to make snowflakes
Note – this pattern uses UK crochet terms.
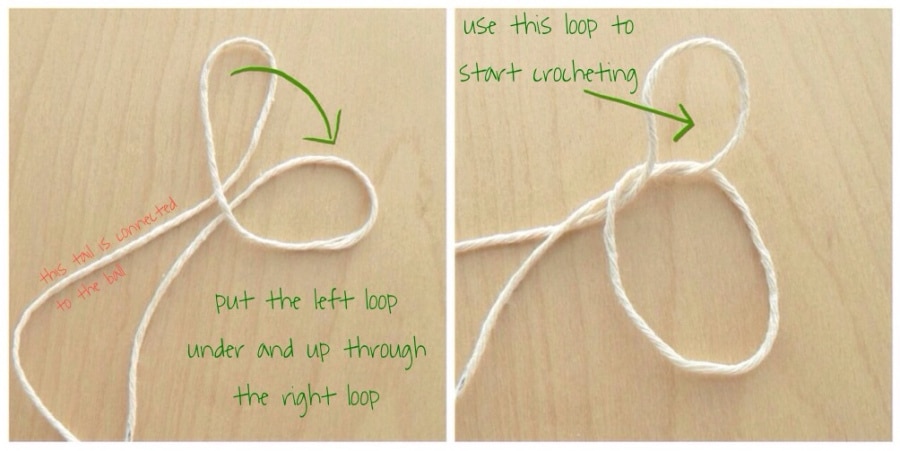
Step 1 – make an adjustable loop for working the first row of stitches into. If you’ve never made an adjustable loop before (they’re very handy) here’s how you do it:
- Make two loops with the end of the twine like in the photo on the left below. The tail of the left loop needs to be connected to the ball. Make sure the tail on the right loop is about 100mm long.
- Take the left loop and pass it under and up through the right loop.
- Pull the tail of what was the left loop to make it the right size for your crochet hook.
- Put your crochet hook into what was the left loop and you’re ready to start crocheting.
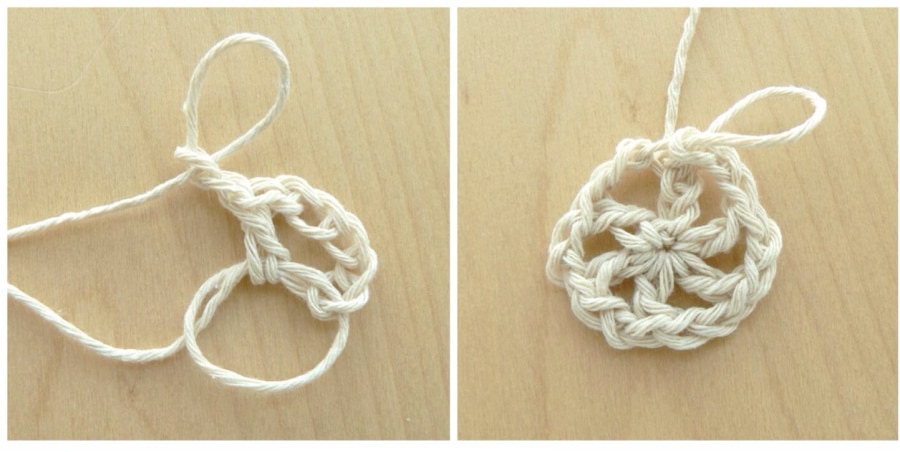
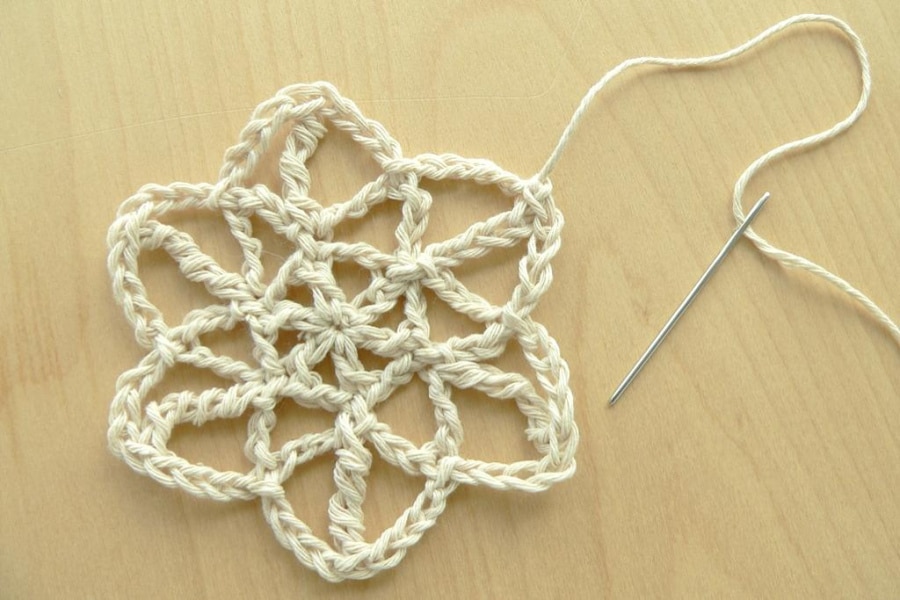
Step 2 (row 1) – make 5 chains, then repeat this combo 5 times – treble into the adjustable loop, 2 chains. Pull the end of the adjustable loop to close the loop, then slip stitch into the 3rd chain that was worked initially. You should have something that looks a little like a wheel with spokes.
Step 3 (row 2) – work this combo 6 times – 7 chains, skip 2 chains, slip stitch into the top of the treble. Then slip stitch into the base of the first chain you made for this row.
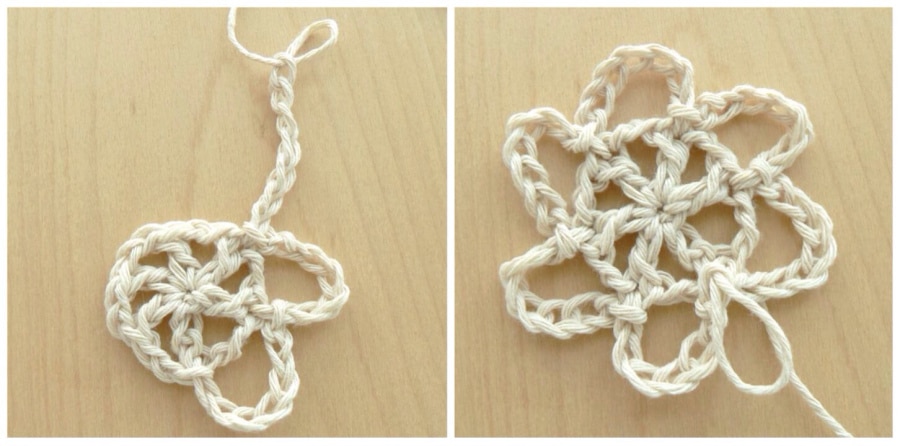
Step 4 (row 3):
This step has a few more steps than the last couple so I’ll break it up for you:
- Work 10 chains, skip 3 chains and slip stitch into the 4th chain.
- Next repeat this combo 5 times – make 4 chains, skip 3 chains and work a quadruple treble crochet (refer below if you need some help with this) into the slip stitch, make 4 chains, skip 3 chains and slip stitch into the 4th chain.
- Then work 4 chains, skip the remaining 3 chains of the last row and slip stitch into the 6th chain you made at the start of this row.
Phew, did you get all that?
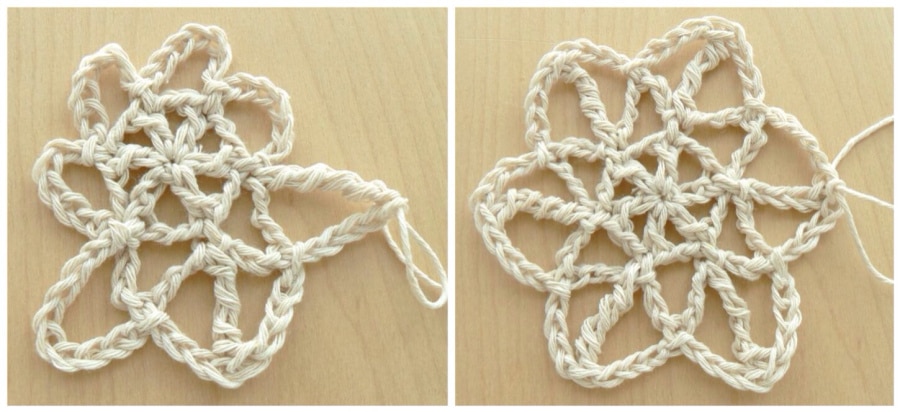
Step 5 – yay, you’ve finished crocheting the snowflake so cut the twine leaving about a 100mm tail and fasten off. Sew in the loose ends and trim.
Are you thinking that your creation doesn’t really look like a snowflake? You’ve got to do step 6 to make your snowflake pointy.
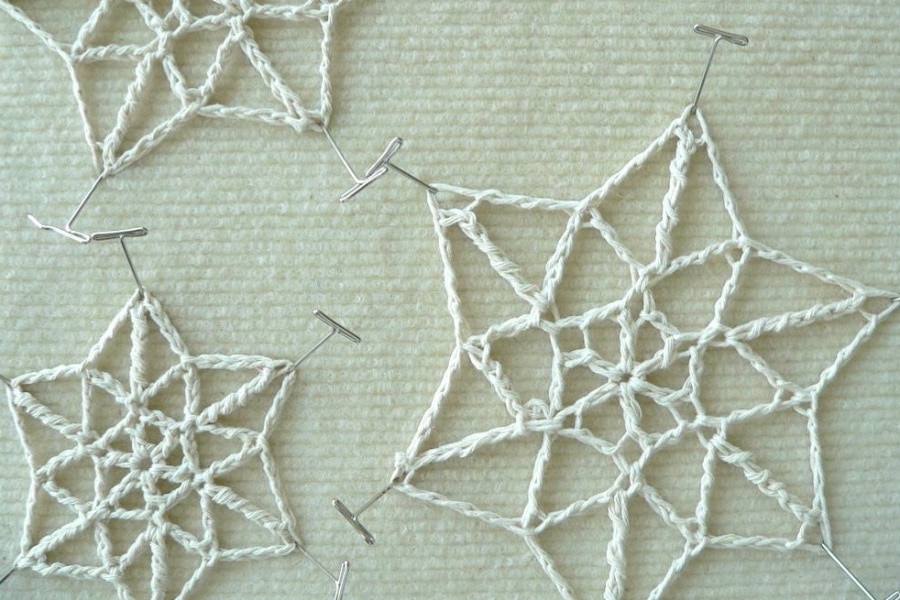
Step 6 – block your snowflake. If you’ve never blocked anything before (this is a handy skill too) here’s a quick run down on how to do it:
- Put your snowflake in a bowl and cover with water. Soak it for about 10 minutes to allow the snowflake to become saturated.
- Take your snowflake out of the water and give it a good stretch by pulling on the points.
- Pin your snowflake points to something soft. As you pin the snowflake make sure the snowflake is stretched and looking symmetrical.
- if you want to make you snowflake nice and stiff then spray it with spray starch.
- Unpin you snowflake once it is completely dry.
Step 7 – cut a length of the coloured twine or yarn, thread it through one of the snowflake points and tie the two ends together. Your snowflake is now ready for hanging!
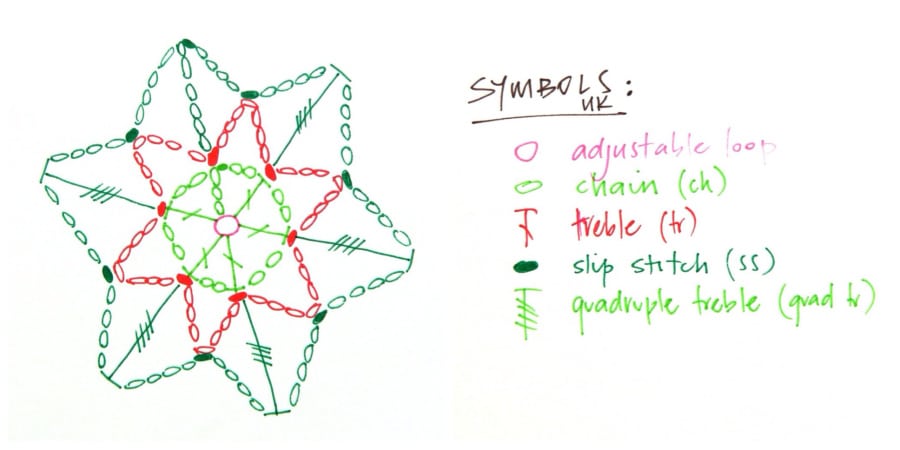
Crochet Chart
If you like to crochet from a chart, here’s the pattern in chart form just for you:
Quadruple Treble Crochet
If you’re a little unsure on how to do a quadruple treble crochet (that’s a mouthful to say), here’s how to do it:
- Put the yarn over the hook 4 times.
- Insert the hook under the top loops of the stitch below.
- Put the yarn around the hook and pull the yarn back under the 2 loops of the stitch below.
- Put the yarn around the hook and pull it through 2 of the loops on the hook. Do this 5 times.
How did you go with the snowflakes? I hope you enjoy making them for your white Christmas! I’ve used these snowflakes in my unique Christmas cards, or if you’re looking to make some snowflake inspired gifts why not have a look at my snowflake scarf post?
You can find this pattern on Ravelry here.
Happy crocheting!
Cheers,
Lynda.
Author
Lynda | Homelea Lass
Hi! I’m Lynda (she/her) and I’m the lady behind Homelea Lass.
I’m here to help you improve your crochet skills and to help you find peace and happiness in your creative time.
In 2012 I was knocked down by debilitating chronic fatigue that put an end to my blossoming career as a Civil Engineer and Project Manager.
Early on in my illness, I discovered that I could crochet without draining my energy, so I spent my days crocheting, researching yarns and designing – this is how Homelea Lass was born.
My experience with chronic illness has guided me to combine my passion for exceptional design and crochet. I’ve developed a way of crocheting that’s enjoyable, easy to understand, and maximises it’s relaxing and wellbeing properties.
As my healing journey has progressed, Homelea Lass has grown, and I feel blessed that I can share my love of Australian merino wool, chunky crochet and creativity with you.